This is a sample scenario of a common store selling vendor products.
Pre-setup Checklist:
- Ensure your Vendor's products are imported to the online store with the correct SKUs
- Obtain feed file location info from your Vendor. For example, FTP, Dropbox, Google Drive, etc.
- Ensure that the feed file is downloadable and provide the relevant login and password if necessary.
Steps to getting Stock Sync set up:
1. Click on Setup New Feed
2. Choose to update existing products in store and click on Continue.
 3. In the Source Setting tab, select the correct source channel and fill up the connection info and file type.
Stock Sync needs compressed file format such as .zip and .gz
4. In the Source Column Mapping tab, click on the + Add field to select a field that you would like to update, eg. InventoryQuantity, Price, Weight, Description, and Product's Title.
Please make sure to map the fields according to the feed file provided by your supplier or drop shipper.

5. Under Click for more settings section for the quantity and price field, you are able to control the prices of your products and control their quantity levels.
6. Click on Next for Advanced Settings, by default the track quantity is enabled.
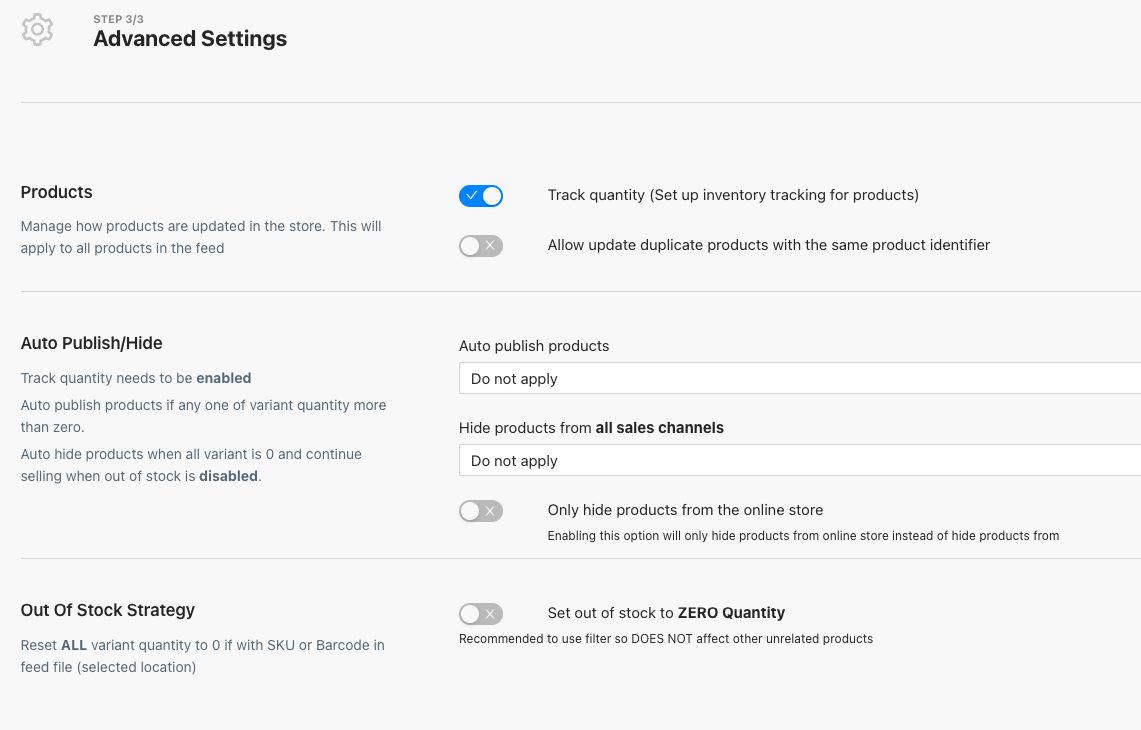
This will enable the track quantity for all the products updated. If you wish to be as it is, please disable the option.
You can enable the Auto Publish/Hide products from the store.
Out of stock strategy will set variants quantity that was not in the feed to 0.
7. Click on Finish to proceed to the Feed Details.
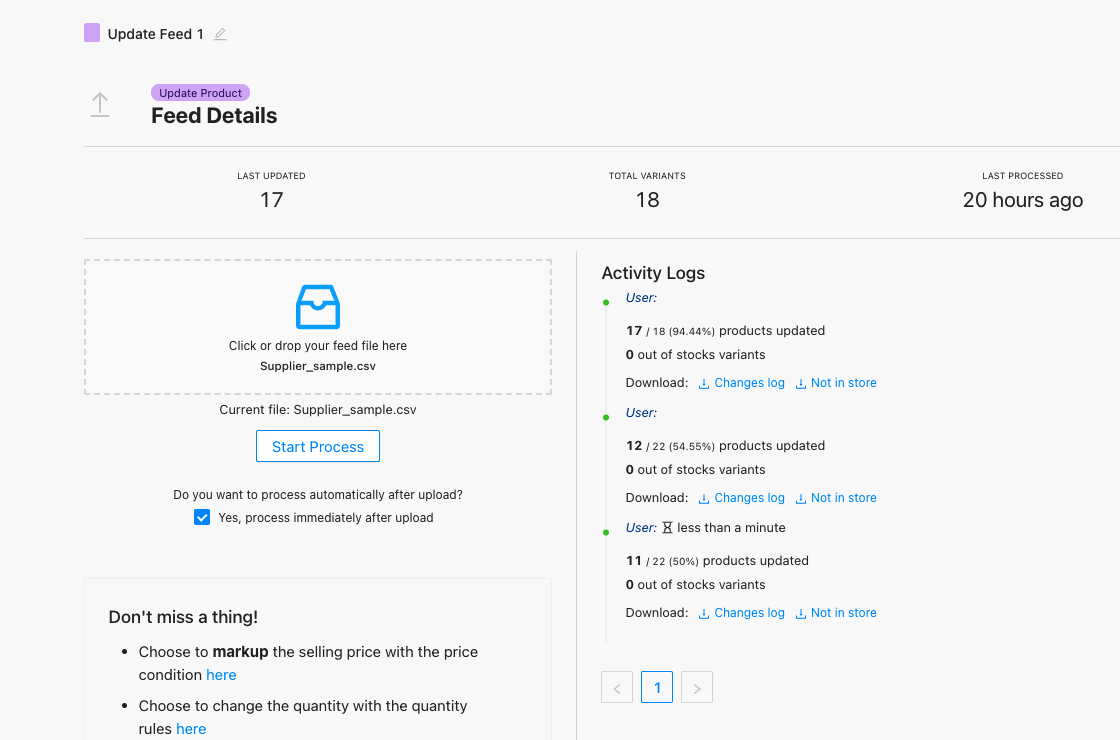
8. On the Feed Details page, you can proceed by clicking on the Start Process.
9. You can also automate the feed by turning on the schedule if the feed connection method is not File Upload.